
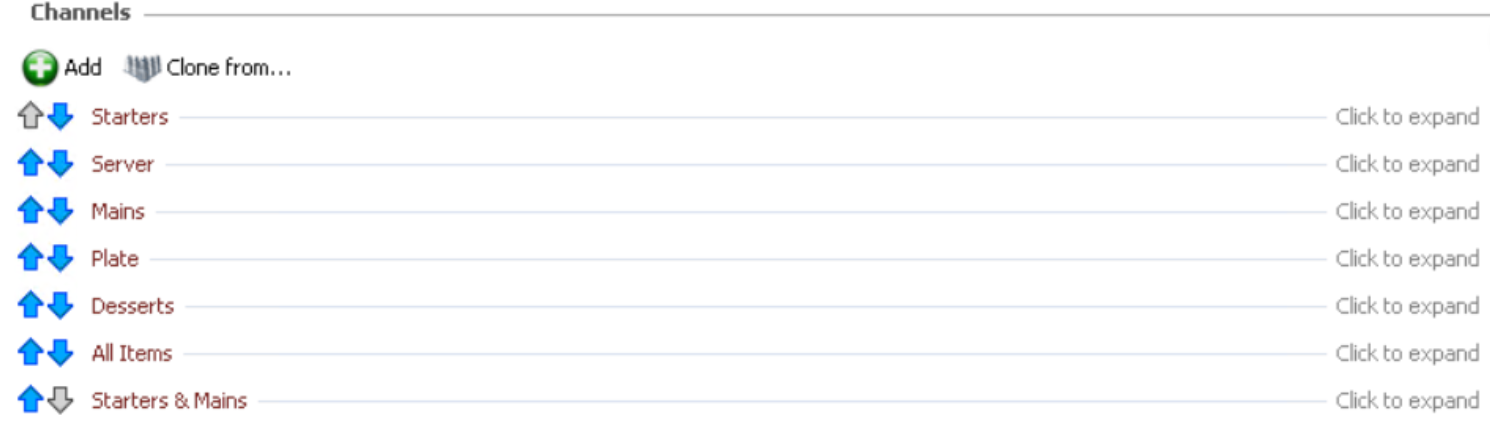
Channels
Channels are assigned to screens and are what the operator of that screen is shown. Depending on the configuration different views are available so orders can be presented in different formats with different settings.
Channels can be added manually or using the "Clone from" option.
It's recommended to use the Clone from option after setting up your first channel and then changing any stations, views or settings as required
| Option | Description / Usage |
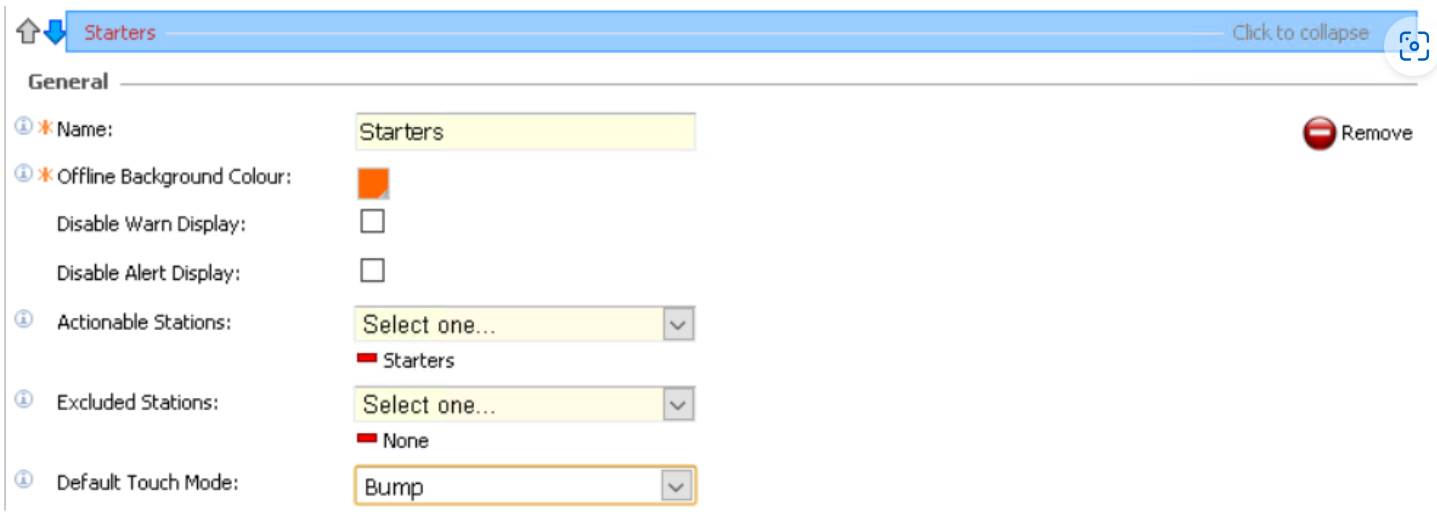
| Name | Entry box to define the name of the channel - names are shown up in other areas of configuration and on the screen itself |
| Offline Background Colour | Colour pick to define the offline colour of a screen, if the screen looses connection to the kitchen server then it will change its background colour to that set, the default is orange |
| Disable Warn Display | Check box to define if the warn alert on timers / ticket headers should be disabled, this can be useful for screens that might be customer facing and not appropriate to show orange tickets |
| Disable Alert Display | Check box to define if the warn alert on timers / ticket headers should be disabled, this can be useful for screens that might be customer facing and not appropriate to show red tickets |
| Actionable Stations | Drop down to define the stations that will be actionable on this channel - this setting defines what the operator of the screen will see when the channel is presented if the station of "starters" was selected then any product items routed to starters will be displayed on this channel. Example: Actionable Stations set to "Prep1" station. Excluded Stations set to "None" View will only show the account when all the orderlines are at Prep1 - Account items will disappear from this view as soon as one of the lines is bumped from "Prep 1" to any other station |
| Excluded Stations | Drop down to define the stations which will be excluded on this channel (only applicable to "panel" and "customer" views).
Example: Actionable Stations set to "Server". Excluded Stations set to "Prep1, Prep2, Assembly" View will not show the account if any of the lines are at not at "Server". Account will become visible when all the lines are bumped to "Server" |
| Default Touch Mode |
Drop down to define the default behaviour of touch screens - this setting defines what action will be automatically set for touch screens (buttons appear on the screen and the default chosen here will be set as the standard mode on the screen)
|
| Load Balancing Rules | Dropdown to define the Load Balancing Rules (configured in the Routing Rules tab) which will be accessible by site users from the screen menu. |
| Option | Description / Usage |
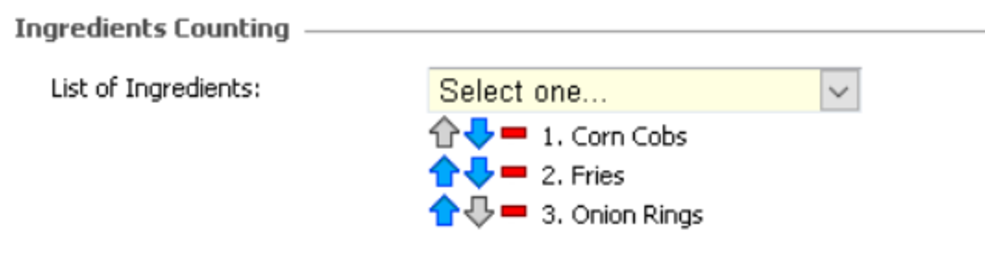
| List of Ingredients | Drop down to define the required ingredient count items to be displayed on the channel.
Ingredient Count will include items from Preparation and Assembly, Waiting to Start items will be excluded. |
| Count Panel Styling |
Determines how ingredient counts are displayed:
|
| Option | Description / Usage |
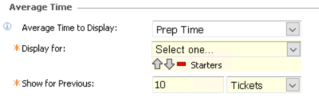
| Average Time to Display |
Drop down to define if the average time is to be used mode for the channel it will operate in
|
| Display For |
Drop down to define the courses to be displayed on the channel, one or more courses can be selected |
| Show for Previous |
Entry box and drop down to define either:
|
The average time displays on any channel on the bottom information bar with the course colour / icon and time in MM:SS. Average Times will be exported to a JSON file in the installation path of the Kitchen iQ site server PC.
Views
Each channel can contain a number of views, the view determines the layout of the screen along with configurations that effect how orders are displayed to the operator.
Click on the headers below to expand each:
Show Child Line with One per row applied will allow site users to navigate to individual child lines using bump bar Item Up/Down controls. Users can then tag an icon next to the child line using 'Bump', giving users the ability to indicate that an child line was collected or delivered.


| Option | Description / Usage |
|---|---|
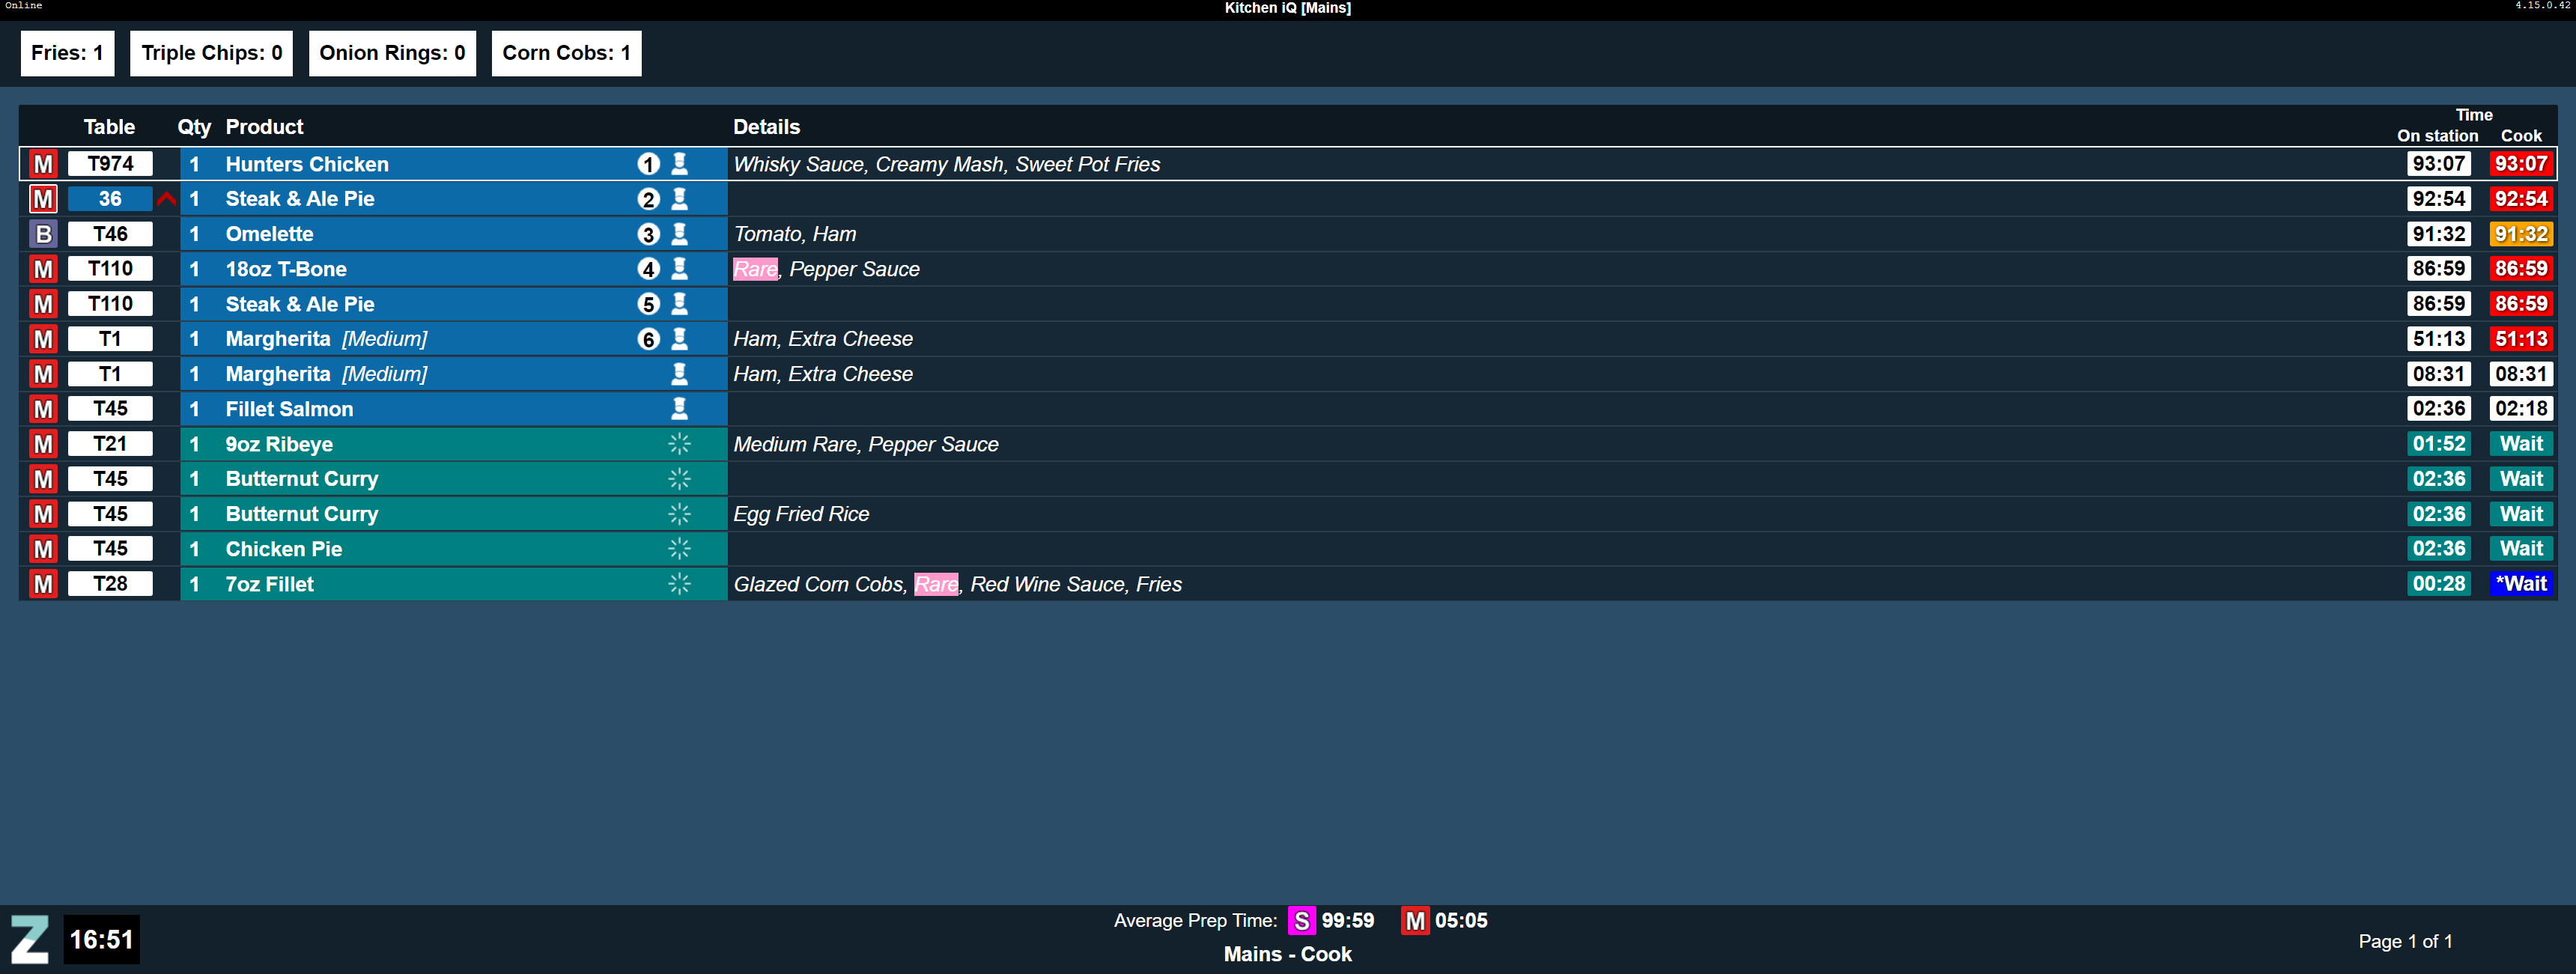
| Views - Item View | |
| View Name | Entry box to define the name of the view shown next to the channel name on screen |
| Background Colour | Colour pick to define the background colour of the view (note if custom images have been set this will take presidence until any orders / information is shown |
| View Type | Drop down to define the type of view to be displayed |
| Show When |
Drop down to define when the ticket should be displayed
|
| Allowed Actions |
Drop down to define the allowed actions on the channel, one or more can be selected
|
| Settings - Item View | |
| Hide Items |
Drop down to define which items are to be hidden, multiple can be selected
|
| Sort Pending Active Items | Check box to define if pending active items are moved to below the last active ticket / moved above other system held items (pending active items are those that are on hold but pending after the previous course has left the system) |
| Ingredient Counts | Check box to define if ingredient counts should be displayed on this channel |
| Highlight Text | Check box to define if text should be highlighted based on text rule configuration |

To be able to use the cook time view, cook times must be enabled in Configuration | Cook Times
| Option | Description / Usage |
|---|---|
| Views - Count View | |
| View Name | Entry box to define the name of the view shown next to the channel name on screen |
| Background Colour | Colour pick to define the background colour of the view (note if custom images have been set this will take presidence until any orders / information is shown |
| View Type | Drop down to define the type of view to be displayed |
| Count |
Drop down to define what count option will be used to total product items
|
| Settings - Count View | |
| Hide Items |
|
| Ignore Child Lines | Drop down to define how secondary items ordered as part of a choice or via and And button / panel should be included as part of count figures or ignored and only the parent item be used |
| Highlight Text | Check box to define if text should be highlighted based on text rule configuration |

")
| Option | Description / Usage |
|---|---|
| Views - Customer View | |
| View Name | Entry box to define the name of the view shown next to the channel name on screen |
| Background Colour | Colour pick to define the background colour of the view (note if custom images have been set this will take presidence until any orders / information is shown |
| View Type | Drop down to define the type of view to be displayed |
| Kitchen Status Display |
Drop down to define what statues are being used for the display
|
| Destinations Shown | Drop down to define which order destinations are to be included within the view, one or more can be selected |
| Table Number Prefix | Check box to define if the table number prefix of "Table" is to be overriden, for example this could be changed to "Order" 7 characters are supported |
| Account Number Prefix | Entry box to define if the account number prefix is to be set rather than just showing the account number, for example this could be set as "Order#" 7 characters are supported |
| Show Number of Items | Check box to define if the number of product items are shown on the view |
| Show Customer Name | Check box to define if the customer name is shown on the view |
| Show Order Stage Colour | Check box to define if the order stage colour is show on the view |
| Show Order Stage Display Name | Check box to define if the order stage display name is shown on the view |
| Option | Description / Usage |
|---|---|
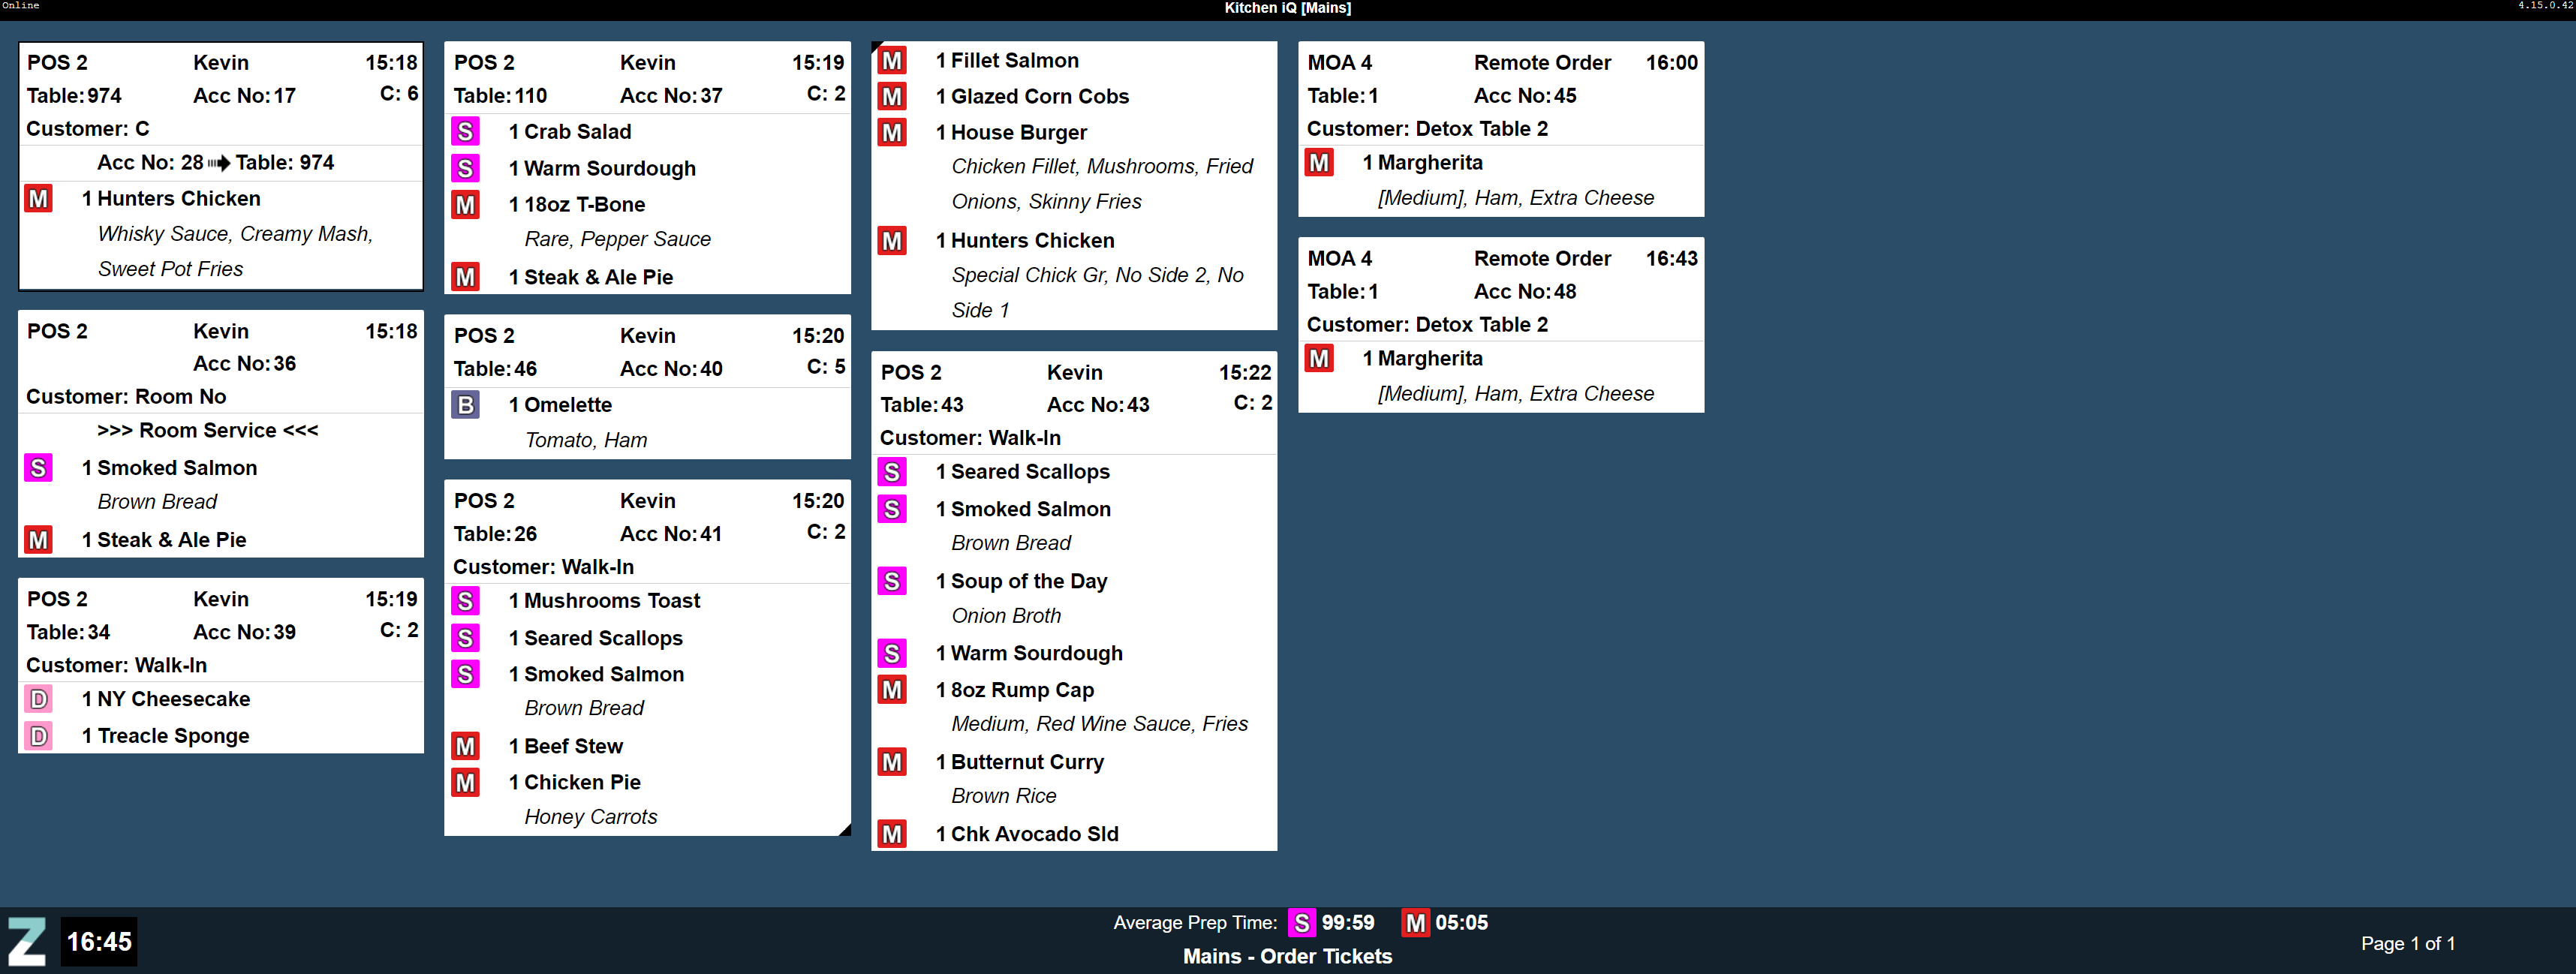
| Views - Order Ticket View | |
| View Name | Entry box to define the name of the view shown next to the channel name on screen |
| Background Colour | Colour pick to define the background colour of the view (note if custom images have been set this will take presidence until any orders / information is shown |
| View Type | Drop down to define the type of view to be displayed |
| Ticket Removal |
Drop down to define when the ticket is removed from the view
|
| Delay Before Ticket Removal | Entry box to define the time delay before the ticket is removed from the view MM:SS (based on the ticket removal rule) |
| Combine Identical Items | Check box to define it identical products are combined and displayed as quantity value - for example 2 x XXXX - 3 x XXXX |
| Show Child Lines |
Drop down to define how secondary items ordered as part of a choice or via and And button / panel
|
| Option | Description / Usage |
|---|---|
| Views - Table View | |
| View Name | Entry box to define the name of the view shown next to the channel name on screen |
| Background Colour | Colour pick to define the background colour of the view (note if custom images have been set this will take presidence until any orders / information is shown |
| View Type | Drop down to define the type of view to be displayed |
| Destinations Shown | Drop down to define which order destinations are to be included within the table view, one or more can be included |
| Show Number of Items | Check box to define if the count of items is to be displayed |
| Table Status Display |
Drop down to define which statues are displayed on the table view
|
| Kitchen Status Display |
Drop down to define which kitchen statues are displayed on the table view
|
| Table Removal |
Drop down to define when the table will be removed from the view
|
| Delay Before Table Removal | Entry box to define the delay before the table is removed from the view MM:SS |

| Option | Description / Usage |
|---|---|
| Views - Delivered View | |
| View Name | Entry box to define the name of the view shown next to the channel name on screen |
| Background Colour | Colour pick to define the background colour of the view (note if custom images have been set this will take presidence until any orders / information is shown |
| View Type | Drop down to define the type of view to be displayed |
| Delay Before Ticket Removal | Entry box to define the time before tickets are removed from this view MM:SS |
| Show Customer Name | Check box to define if the customer name is displayed at the top of order ticket |
| Show Child Lines |
Drop down to define how secondary items ordered as part of a choice or via and And button / panel
|
